How To Add A Time Zone To Outlook Calendar
How To Add A Time Zone To Outlook Calendar - On the backstage screen, click “options” in the list of items on the left. Web > go to options > calendar. Click the gear icon on the right side of the ribbon and select: Check ‘show a second time. Web in the gear>calendar>view section of outlook, confirm that the time zone setting is correct and ensure that the appropriate time zone is selected in the show. Click the gear icon in the top right corner. In the outlook options dialog box, on the calendar tab, under time zones:. You can also add additional time zone in windows. These will then appear in your calendar view with the labels defined: And if you live in outlook all day, here's a look at how to manage time zones better.
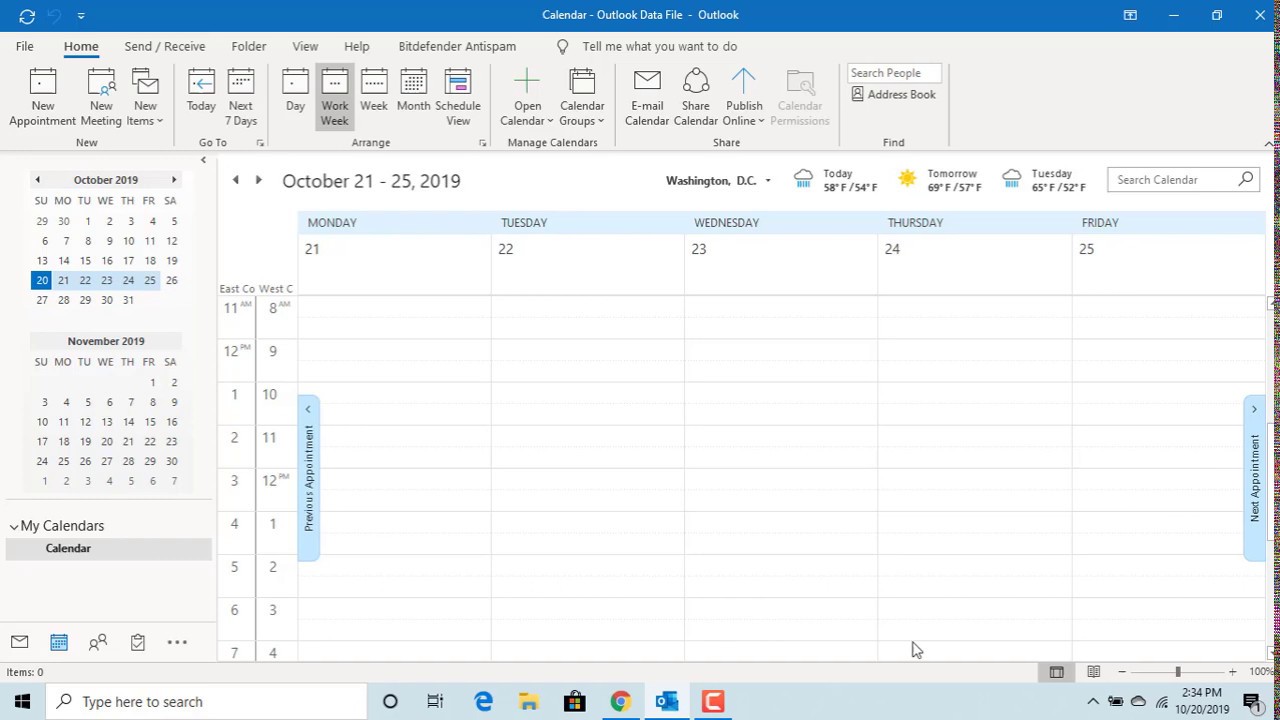
Web to get started, open up outlook and click on the “file” tab. You can also add additional time zone in windows. Web learn how to set your time zone, language, and the date and time format settings in outlook on the web and new outlook. On the backstage screen, click “options” in the list of items on the left. Check ‘show a second time. Navigate to the calendar view by clicking the calendar icon on the bottom left corner of your outlook screen. Select the check boxes for one or both show a second time zone. On the home tab, click day, work week or week. Settings > calendar > view > time zones Suppose you have a meeting with people who live in different time zone.
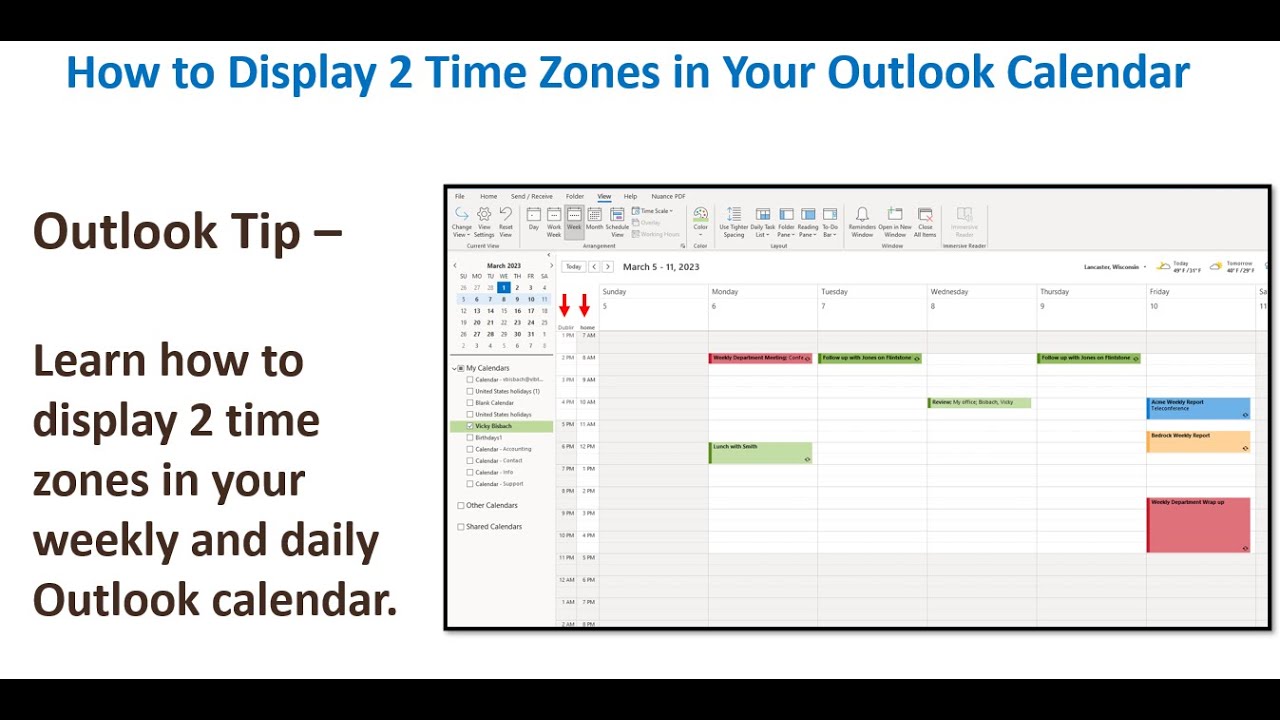
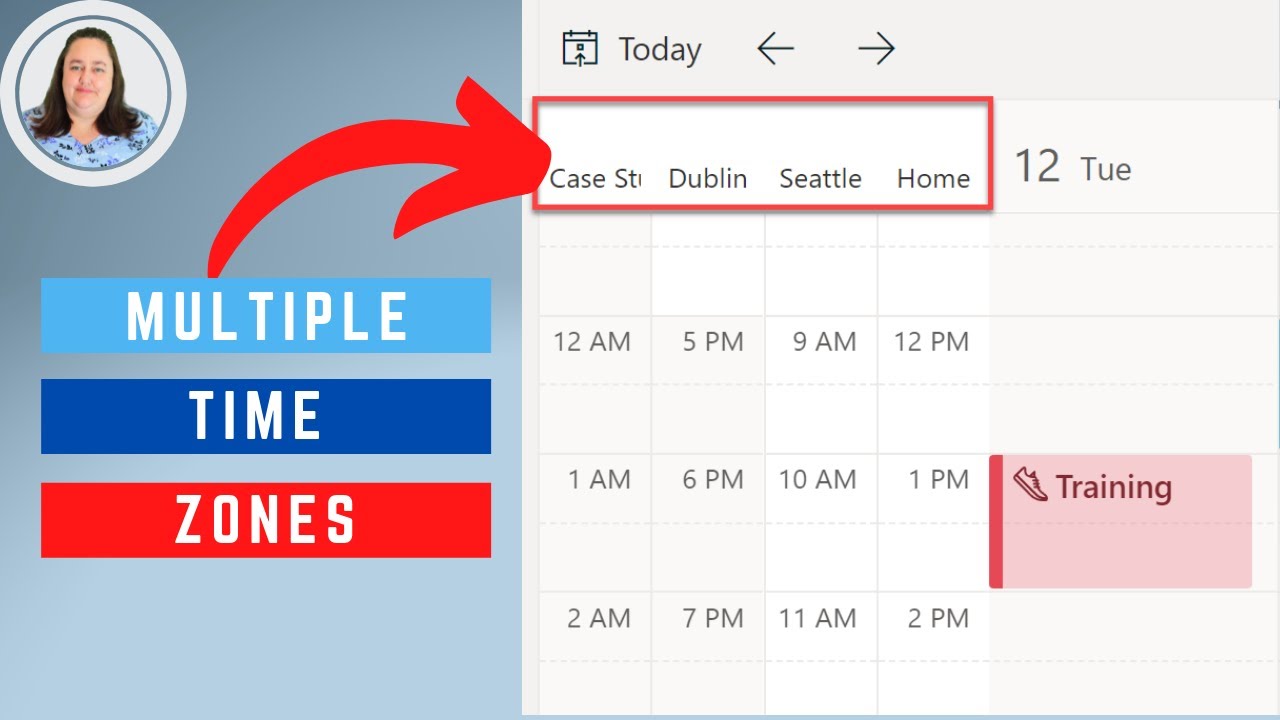
Web learn how to set your time zone, language, and the date and time format settings in outlook on the web and new outlook. Click the gear icon on the right side of the ribbon and select: In the latest version of outlook for microsoft 365 for mac and outlook 2019, three separate time zones can be displayed in the calendar. > scroll down to time zones and enable to show second time zone. On the home tab, click day, work week or week. Find the calendar tab and look under time zones. Check ‘show a second time. Select the check boxes for one or both show a second time zone. On the backstage screen, click “options” in the list of items on the left. Navigate to the calendar view by clicking the calendar icon on the bottom left corner of your outlook screen.
How to Add Time Zone to your Calendar in Outlook Office 365 YouTube
Web to set an outlook event in a different time zone, you can follow these steps: Navigate to the calendar view by clicking the calendar icon on the bottom left corner of your outlook screen. Web in the gear>calendar>view section of outlook, confirm that the time zone setting is correct and ensure that the appropriate time zone is selected in.
How to Display 2 Time Zones in Your Outlook Calendar YouTube
Web in the gear>calendar>view section of outlook, confirm that the time zone setting is correct and ensure that the appropriate time zone is selected in the show. Web add a second or third time zone. Web to add a new time zone to your calendar view, do the following: Settings > calendar > view > time zones > scroll down.

How to display two time zones in Outlook calendar?
These will then appear in your calendar view with the labels defined: Navigate to the file tab in outlook. Web learn how to set your time zone, language, and the date and time format settings in outlook on the web and new outlook. Web use the show a second time zone in day and week view and, if desired, show.
Add Multiple Time Zones to Outlook Calendar Web and Desktop YouTube
Web to get started, open up outlook and click on the “file” tab. Web > go to options > calendar. Scroll down to the “time zones”. Settings > calendar > view > time zones Suppose you have a meeting with people who live in different time zone.

Add a Second Time Zone to Outlook Calendar A StepbyStep Guide
And if you live in outlook all day, here's a look at how to manage time zones better. In the latest version of outlook for microsoft 365 for mac and outlook 2019, three separate time zones can be displayed in the calendar. Web use the show a second time zone in day and week view and, if desired, show a.

How To Add Time Zones To Outlook Calendar
Web to add a second time zone to your calendar, open outlook and click the “file” tab. Web to get started, open up outlook and click on the “file” tab. To avoid confusion and ensure everyone arrives. Navigate to the calendar view by clicking the calendar icon on the bottom left corner of your outlook screen. > scroll down to.

How to add multiple time zones in Outlook calendar
Open outlook and go to the calendar view. Web to set an outlook event in a different time zone, you can follow these steps: In the latest version of outlook for microsoft 365 for mac and outlook 2019, three separate time zones can be displayed in the calendar. Web > go to options > calendar. Select the check boxes for.

blog.atwork.at How to use multiple time zones in your Outlook calendar
To avoid confusion and ensure everyone arrives. Click the gear icon in the top right corner. Open outlook and go to the calendar view. Click the gear icon on the right side of the ribbon and select: Web schedule a meeting in outlook for a specific time zone.

How to Add an Additional Time Zone to Calendar in Outlook by Turner
On the home tab, click day, work week or week. Click on the new appointment button to. On the backstage screen, click “options” in the list of items on the left. Web how to change time zone in outlook on the web. You can also add additional time zone in windows.

How To Set Two Time Zones In Outlook Calendar How to display two Time
On the home tab, click day, work week or week. Select the check boxes for one or both show a second time zone. Click on the new appointment button to. Open outlook and go to the calendar view. Web > go to options > calendar.
And If You Live In Outlook All Day, Here's A Look At How To Manage Time Zones Better.
Web to get started, open up outlook and click on the “file” tab. Find the calendar tab and look under time zones. In the outlook options dialog box, on the calendar tab, under time zones:. > scroll down to time zones and enable to show second time zone.
On The Backstage Screen, Click “Options” In The List Of Items On The Left.
Web to add a new time zone to your calendar view, do the following: Suppose you have a meeting with people who live in different time zone. On the file tab, click options: Open outlook and go to the calendar view.
Web To Add A Second Time Zone To Your Calendar, Open Outlook And Click The “File” Tab.
Web to set an outlook event in a different time zone, you can follow these steps: Navigate to the file tab in outlook. Select the check boxes for one or both show a second time zone. Navigate to the calendar view by clicking the calendar icon on the bottom left corner of your outlook screen.
On The Home Tab, Click Day, Work Week Or Week.
Web add a second or third time zone. Click the gear icon in the top right corner. It’s as simple as that, once you’ve got the update. These will then appear in your calendar view with the labels defined: