How To Change Printable Area In Excel
How To Change Printable Area In Excel - Select the cells you want to print by clicking and dragging the mouse over them. Ensure that the cells you select are the ones you want to appear in the print. Select the desired data table. Go to the file tab and click print. Step 4) align data to the left. Only the print area will be printed. Start by selecting the cells on the worksheet that you want to print. Web the print area in excel is an option to create a print area covering one or multiple cell ranges that one wants to print instead of the worksheet. The page setup dialog box will open on the window. Web if you want to change the print area in excel, just select a new cell range in your excel sheet.
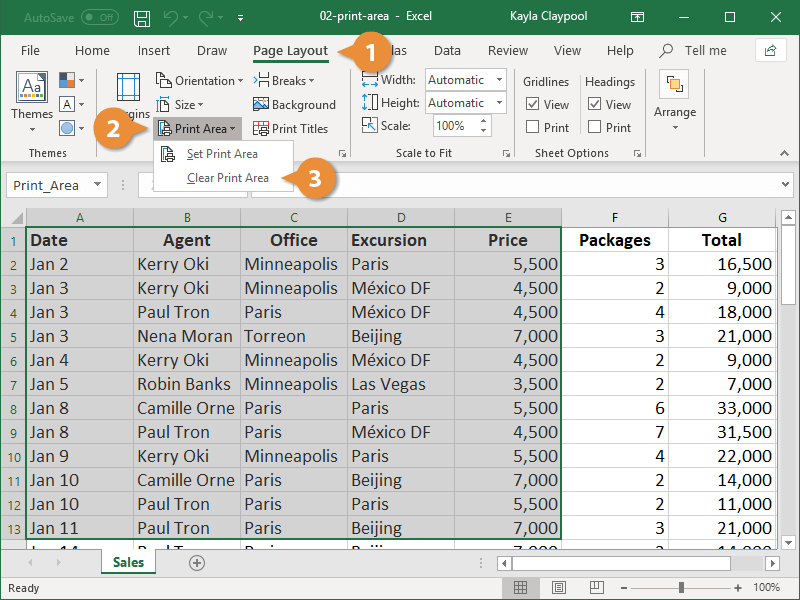
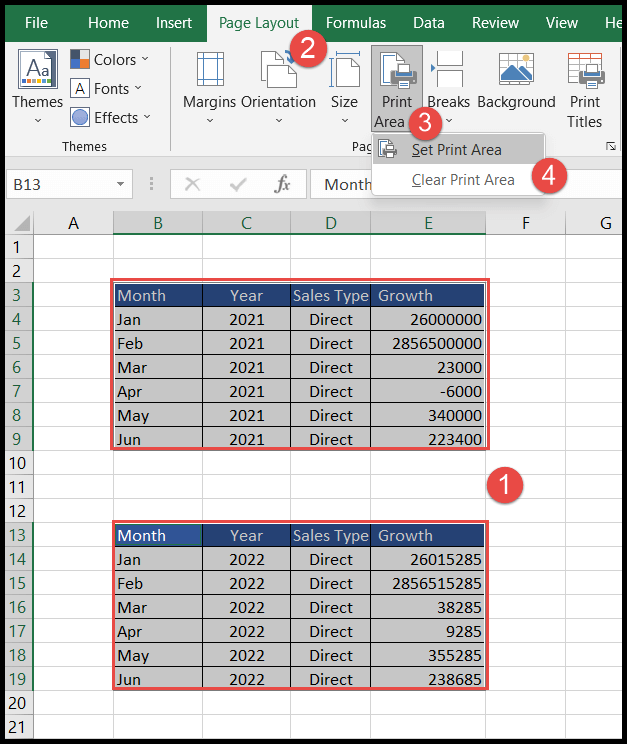
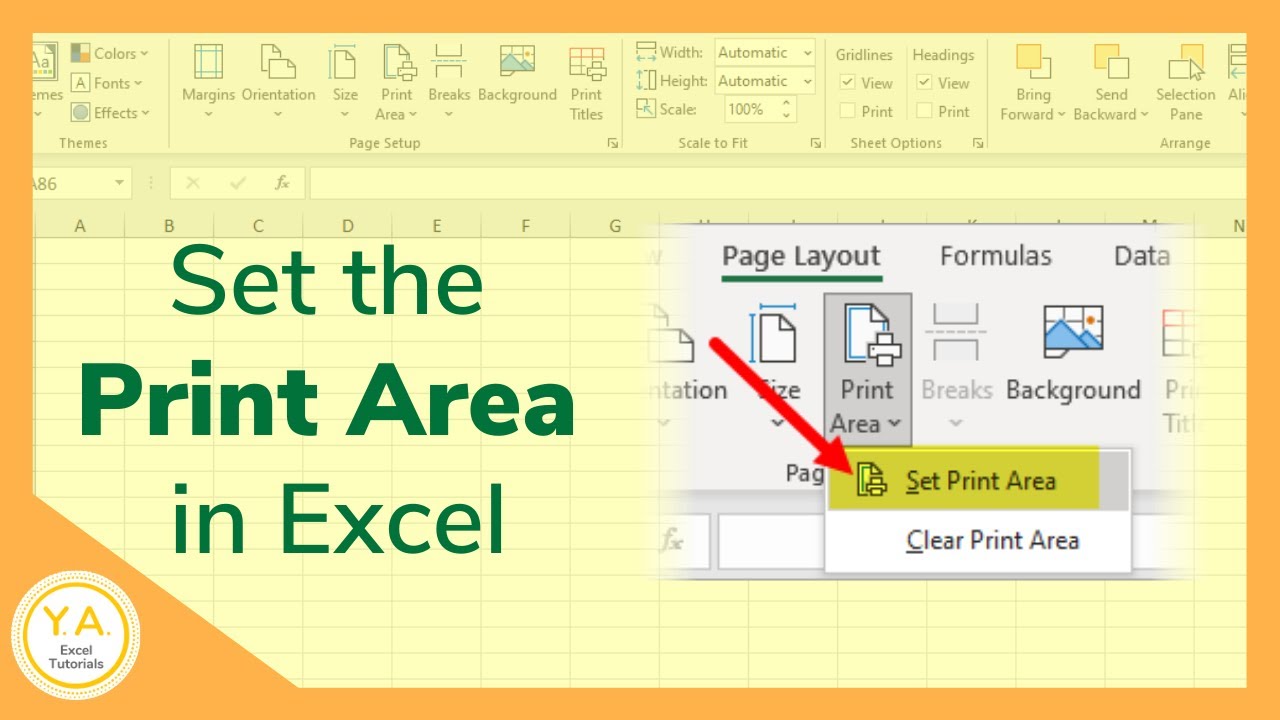
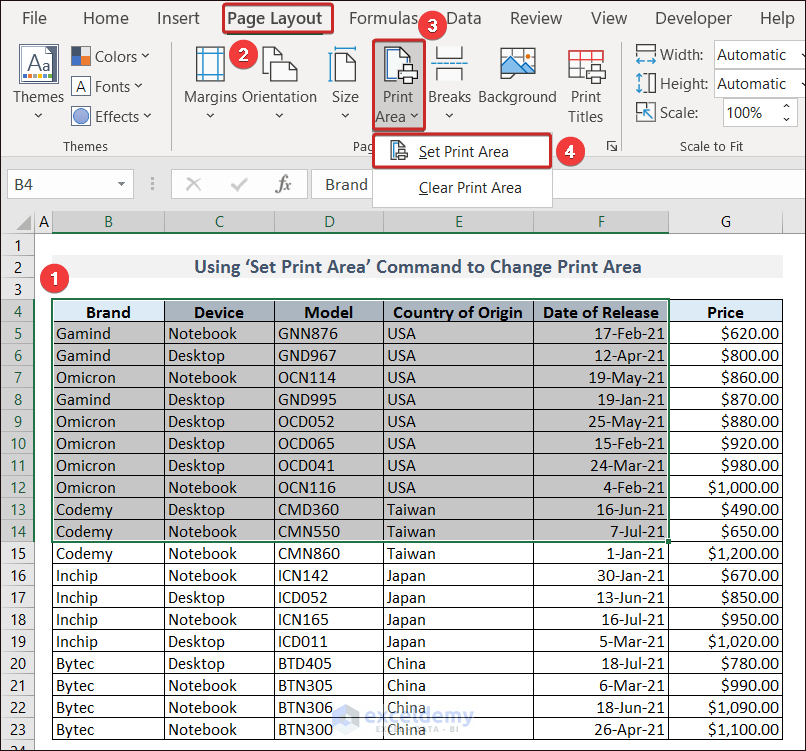
You can enlarge the print area by adding adjacent cells. Step 2) format data in microsoft excel. Open the excel file you want to work with. Select a range of cells. In the print dropdown, click on the “set print area”. Choose the set print area option from the print area option. Select your print area —> page layout tab —> print area —> set print area. Web to set a single print area in excel, you can use the set print area command, page setup dialog box, page break preview feature, print selection setting, and excel vba code, as described in this section. The print area changed to b4:f14. Web 7 ways to set the print area in microsoft excel.
You can set one or more print areas in the same excel sheet. Select the desired data table. Ensure that the cells you select are the ones you want to appear in the print. Go to the page layout tab on the ribbon at the top of excel. What is the print area in excel. Web setting the print area is particularly useful if you want to print a selection and not the whole worksheet or if you want to divide the whole sheet into sectioned bits to be printed. Web you can set the print area in excel by selecting the print area option from the page layout tab after selecting an area in your worksheet. Open the excel file you want to work with. Click the print area button in the page setup group. That way, when you print your worksheet, only that section will print.
How to Set Print Area in Excel CustomGuide
Go to the page layout option. Go to the page layout tab on the ribbon at the top of excel. You can add cells to expand the print area as needed, and you can clear the print area to print the entire worksheet. Web see how to set, change and clear print area in excel manually and how to define.
How to Set Print Area in Excel (Add, Clear, and Ignore)
What is the print area in excel. On the file tab, click print. Then, highlight the range you want to print, and in the ribbon, go to page layout > print area > set print area. Keep watching and print any part of your excel sheet without a hitch!watch next video tutori. Step 5) enclose data in boxes.

How to Change Print Area in Excel (5 Methods) ExcelDemy
Click on the ‘page layout’ tab in the ribbon at the top of the screen. The page setup dialog box will open on the window. Here, i’m explaining to you several methods for setting a print area in excel with steps and illustrations. Web we can set print area in excel for multiple pages very effectively following the 2 ways.

How To Change Printable Area In Excel
Web in short, you have to navigate to “ page layout ” > “ page setup ” > “ print area ” > “ set print area.” in this article, i’ll show you how to set the print area for microsoft excel. Step 2) format data in microsoft excel. Web how to set a print area in excel. Ensure that.

How To Change Printable Area In Excel
Click and drag to select the range of cells that you want to print, including any row or column labels or headings. Step 4) align data to the left. Web see how to set, change and clear print area in excel manually and how to define print areas for multiple sheets by using macros. On the page layout tab, in.
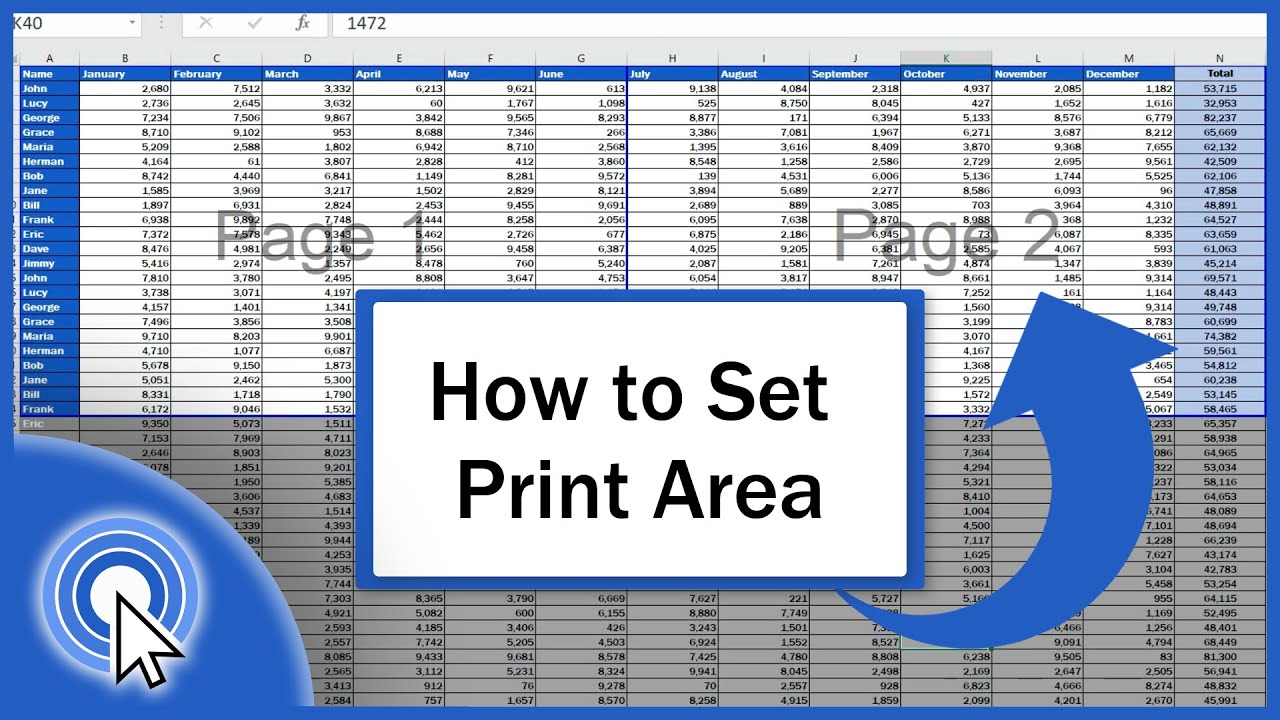
Print Area in Excel Tutorial YouTube
Go to the file tab and click print. How to change print area in excel. Go to the print titles option on the side of the print area option. That way, when you print your worksheet, only that section will print. Open the excel file you want to work with.
How To Change Printable Area In Excel
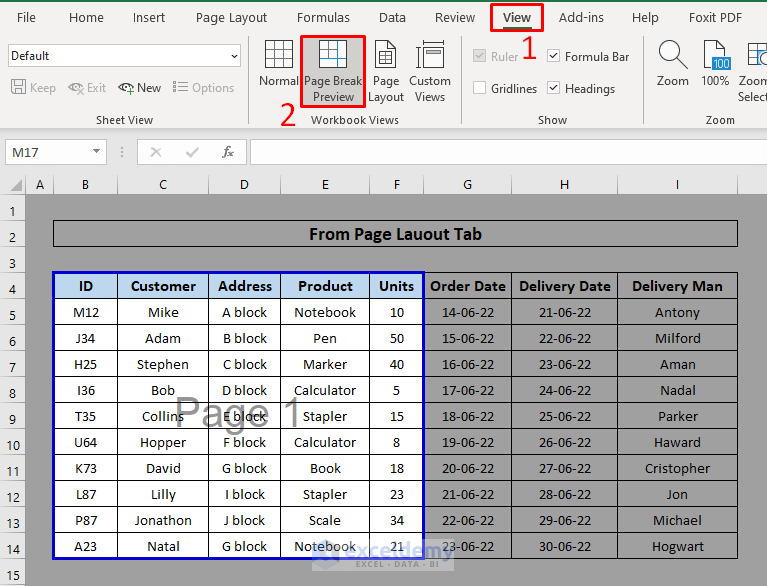
In the ribbon go to view > page break preview. Save, close and reopen the excel file. Open the excel file you want to work with. Step 6) set the print area, print preview & page layout. Web setting print areas in excel is a simple and straightforward process.
How to Change the Print Area in Excel 7 Methods ExcelDemy
Change the print area in page break preview. Select the cells you want to print by clicking and dragging the mouse over them. Choose the set print area option from the print area option. Web setting the print area is particularly useful if you want to print a selection and not the whole worksheet or if you want to divide.
How to Set the Print Area in Excel (Step by Step) YouTube
Web if you want to change the print area in excel, just select a new cell range in your excel sheet. Go to the page layout tab. The print area changed to b4:f14. Change the print area in page break preview. Select the cells you want to print by clicking and dragging the mouse over them.
How To Adjust Printable Area In Excel
Web if you want to change the print area in excel, just select a new cell range in your excel sheet. Then, highlight the range you want to print, and in the ribbon, go to page layout > print area > set print area. See the print preview below. I’ll also walk you through the issues with setting the print.
Web Today We’ll Be Talking About How To Set The Print Area In Excel.
Go to the sheet, select the print preview option, and click ok. Click on the ‘page layout’ tab in the ribbon at the top of the screen. Start by selecting the cells on the worksheet that you want to print. Web if you frequently print a specific section of your worksheet, you can set a print area for it.
And While We Can Expand The Print Area By Adding Cells, We Can Create Multiple Print Areas, Each Printed On A Separate Page.
Select your print area —> page layout tab —> print area —> set print area. Go to the print titles option on the side of the print area option. First, select the single or multiple cell range using the “control” key to set a print area in the sheet. Keep watching and print any part of your excel sheet without a hitch!watch next video tutori.
Click The Print Area Button In The Page Setup Group.
On the file tab, click print. The page setup dialog box will open on the window. Web changing the print area in excel is a straightforward task that ensures only the sections of your spreadsheet that you want to print actually get printed. Only the print area will be printed.
Step 4) Align Data To The Left.
Open the excel file you want to work with. See the print preview below. Select the area you want to print. How to perform arithmetic operations in excel.